Have you ever noticed those plants that grow out of cracks in pavements and walls? Or in gutters and drains? They start out small and innocuous, but unless you realise what they are, they can become HUGE problems!
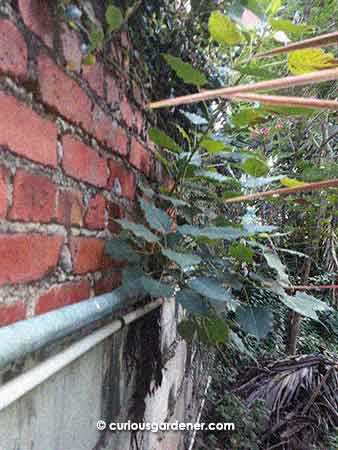
Here’s the ficus plant growing very happily behind the pipe…
I’m talking about the ficus tree. There are many varieties, but I think the name, the Strangling Fig, says it all. This plant has tenacious roots that look like horizontal hairs spreading out from the main plant. In the wild, they grow on the surface of host trees, eventually enveloping and “strangling” the host to death. In urban areas, the roots grow along walls and other solid surfaces, and can, in time, demolish the man-made things because the roots grow into the cracks, then expand.
One such plant grew just outside my neighbour’s back wall. They cut it down once, but it grew back in no time, and eventually broke the wall foundation and shifted the wall enough to start breaking it as the plant grew. In fact, the roots of the plant even entered our garden through the drain, and when discovered and yanked out, had covered about six square metres on our side! Our neighbours eventually had to rebuild their back wall.
We also had one that started growing on the porch roof, that was so deeply embedded that even after some repairs had been done, including cementing over and painting, still managed to break through and continue growing! I’ll just say that whenever I see this plant now, I attack it as quickly as I can.
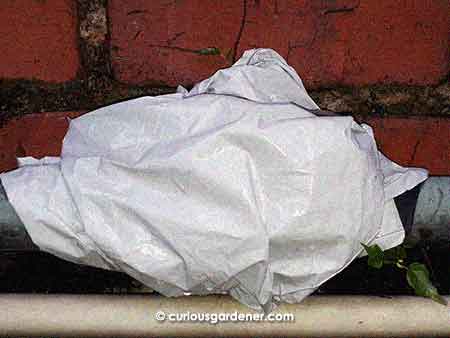
All wrapped up, but the plant still managed to send out a stem (bottom right)
So imagine my horror when we found not one, but TWO of them growing behind our water supply pipe… Even though I kept breaking off the stems and roots, they kept growing. They were firmly entrenched just between the pipe and wall, and I tried pouring things on them and even using a flame, but nothing worked. So, I turned to my experienced buddy, Alexius, for advice. What he said made sense – plants need to photosynthesise, so the best way to kill them is to remove the ability to do so – by plucking off the leaves. “But you need to do this with doggy persistence,” he said.
Apparently I’m not dog-like enough, because the plants began to fight back by sprouting even more stems, and in unreachable places for me. And, I was not persistent enough, so they had the opportunity to keep growing new leaves. So, I had to think harder, and my solution was to block out sunlight for the plants.
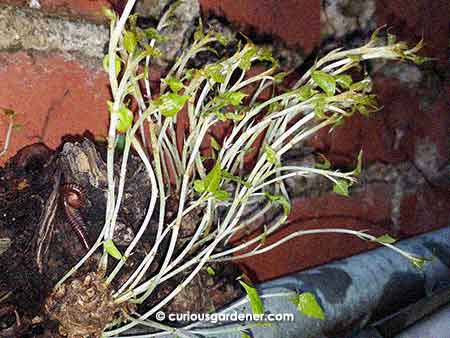
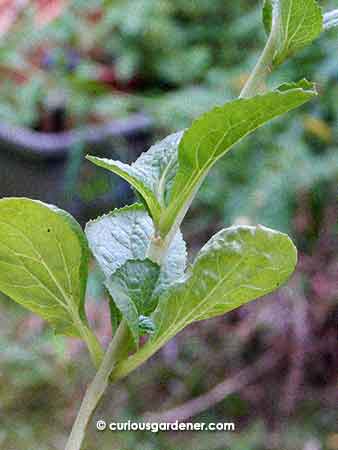
Long pale stems, light green leaves… this plant is desperately trying to find sunlight!
I know what you’re thinking – if a layer of cement and paint didn’t work, what could I use? Well, I chose a couple of plastic delivery envelopes that were so thick that I couldn’t see anything through them when held up to the light. I stripped all stems off the plants, then wrapped them as thoroughly as I could. When I remembered to, over the next few weeks, I checked on them and pulled off all new growth.
I have to say, they were very persistent, because there were a LOT more stems than before! But it seemed that my method was working, because the stems began to get weaker and very etiolated as they tried to search for light. At the last check, I even found some millipedes eating up part of the plant, so I have my fingers crossed that in this situation, we’ll win.
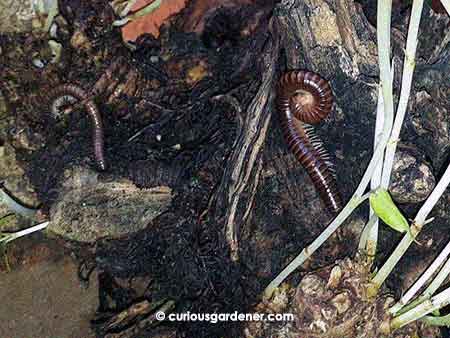
Millipedes eat decaying plant matter. I take this to mean that part of the plant is dead and they are helping to clean up!
If you ever notice this plant, make sure you get rid of it immediately! They look elegant when big (think of the ones at Angkor Wat), but let me scare you one more time… There’s one growing by the roadside somewhere that I pass regularly, and it’s pretty mature. Across the road from it are residential homes, and I’ve noticed a new plant growing out of a drainage hole in the boundary wall. I suspect that the tree roots have spread beneath the road to the other side, and the root has made it to the surface through a crack and is starting to grow a new plant. It has been cut a few times by the crew that maintains the area, but keeps growing back. If I were the homeowner, and knowing what happened to my neighbour’s back wall, I’d be very fearful…
© 2018 curiousgardener.com All rights reserved.