
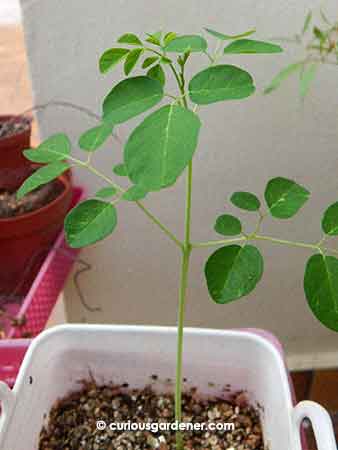
First leaves of the moringa plant.
I’ve been attempting to grow moringa for a while now – quite a few times, actually. We call it the drumstick tree – so named for the long bean pods that may or may not resemble drumsticks. Those pods, when cut into short lengths and added to curries, are a delicious find. The outside of the pod is thick and fibrous, but the insides soften into a jelly-like texture that you scrape off and eat with the curry gravy. It sounds odd but is simply yummy!
Since my dad enjoyed eating curries, he grew the tree once, a very long time ago. The tree grew about two storeys high and was quite abundant. What Dad didn’t know then was that it isn’t a hard-stemmed tree. When strong winds blew by, the branches broke easily. After a couple of times, Dad decided it wasn’t safe to grow it as he had situated it next to the fence and didn’t want to damage the neighbour’s property. And that was the end of the drumstick tree in our garden.
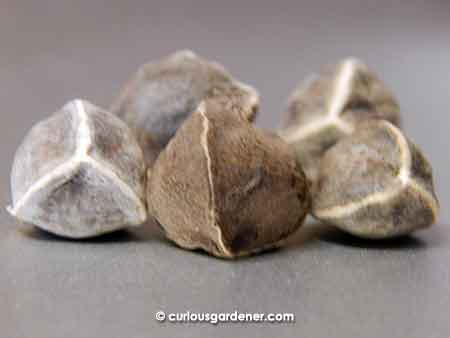
Moringa seeds have a rather hard casing. I cracked them open a little to hopefully hasten the germination process.
Fast forward to the present, and we now have more information on the plant. Imagine my surprise to learn that the drumstick or moringa oleifera tree has many more uses than just the edible pods. Just about every part of the plant can be used – the pods are edible; the seeds yield an edible oil called ben oil; the roots can be shredded and used as a condiment (they taste like horseradish); the young leaves are edible, etc. It has many positive purposes, and grows well in semi-arid to tropical and subtropical regions. My interest in it at the moment is also that in permaculture, it is considered a good “chop and drop” plant, where you prune it often and use the chopped branches to mulch the ground.
Well, I mentioned that I’ve tried growing it a few times. It is supposed to be able to grow easily from cuttings, but for some reason, I haven’t had luck with that. The first couple of times, I simply stuck the cutting into a pot or the ground, and kept the soil damp to encourage roots to grow. It looked like leaves were starting to grow out from the stems, but nothing happened. So I tried rooting the last cutting in water. That didn’t turn out so well, either. The combination of the cutting in water created a slimy, smelly liquid that I changed daily for two weeks before calling it quits. I finally got hold of some seeds at the end of last year, and sowed them. At last, I got results…
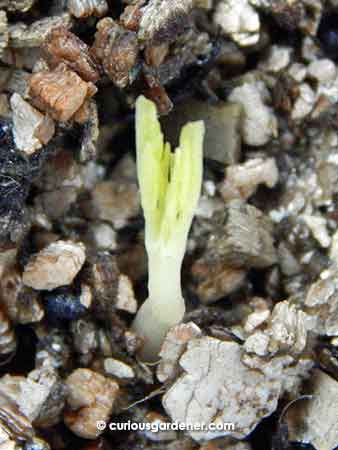
Germination in progress… our first moringa plant!
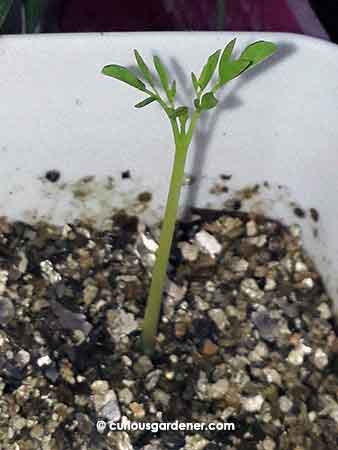
Moringa seeds have a surprisingly hard casing. They look light and papery, but the triangular seeds are sealed tight! Since I was impatient to get a plant growing, I decided to crack open the seeds a little to give them a little head start. In spite of that, it still took almost two weeks before the first seed germinated. It was a thrill to see the little seed leaves beginning to push upwards. No, actually I don’t think they were seed leaves. When opened fully, they looked like regular tripinnate moringa leaves.
Ready for a bigger home now, the moringa plant is almost two weeks old here.
Almost two weeks later, there are a couple more sets of what I’d ordinarily call true leaves, and I think this baby is ready for a bigger home. Dare I plant it out in the garden? Not yet. There are hungry snails out there, and this is a tender, young plant – and at the moment, our only moringa plant. Nope, I’m going to coddle it a bit longer until it grows a thicker, taller stem that snails can’t munch right through. Fingers crossed that that’s not just wishful thinking!
© 2018 curiousgardener.com All rights reserved.