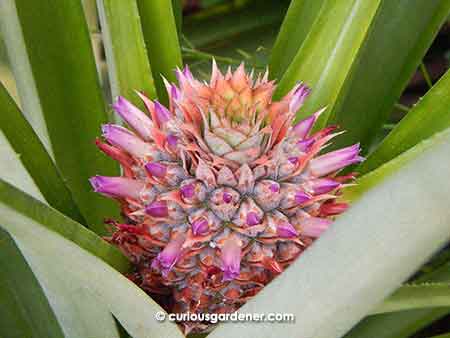
I can’t get over how cute a baby pineapple looks with those purple flowers! This is the ratoon fruit.
I am the great procrastinator. I know that when we harvested our ratoon pineapple last July, I said I was going to detach the sucker that had started growing on the parent plant. I say a lot of things but don’t always follow up on them. So, yes, we now have a second ratoon pineapple developing on the parent plant! And, that sucker has not one, but TWO siblings growing along with it!
Seeing the new pineapple start to grow finally kicked me into action, as I figured the plant would be able to devote more energy to developing the fruit if it didn’t have to also support extra suckers. I easily detached one that was higher on the stem – it came off with a little bit of twisting – and planted it nearby.
The second sucker, however, proved to be stubborn. It was lower on the stem and was leaning over a bit. I twisted it, and I yanked it, but it wouldn’t break off. Common sense made me stop, because the entire parent plant was rocking away, and I didn’t want to traumatise it and lose the new fruit. What I think has happened is that the sucker has taken root in the ground, because they do start to grow roots when on the parent plant, and it’s near ground level. I can’t tell for certain, though, because of the spiky leaves in the way. Does that make it a new, independent plant, or is it still a ratoon?
So, taking stock of things, here’s how we’ve multiplied our pineapple plants over the years: We started with the single plant that bore a beautiful, delicious pineapple. We replanted the top and harvested one sucker, and left the second sucker to try growing a ratoon pineapple. When we harvested that ratoon pineapple, we replanted that top, and the parent plant ended up growing another three suckers. One is now beginning to fruit, one has been detached and replanted, and the third has possibly taken root by itself. So, we started with one plant, and ended up with eight! Two have been harvested, and six are currently growing.
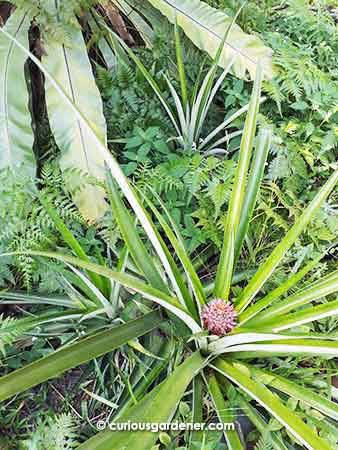
Ratoon fruit in the foreground, with the likely rooted sucker next to it. The detached sucker is in the background. I guess this is going to be a pineapple bed.
This brings up another question – how many suckers can a pineapple plant produce in the course of its lifetime? The original plant has already grown five. That being the case, we could have the beginnings of a pineapple plantation on our hands! It has taken six years to reach this point, though. You have to be really patient when growing pineapples!
© 2018 curiousgardener.com All rights reserved.