
The cucumber plants took well to being planted out. They didn’t even mind being planted close to the foliage plants.
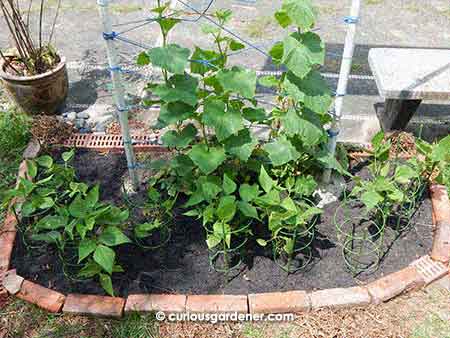
When the extra-long weekend came along this past Chinese New Year, I was happily anticipating catching up with several of my gardening tasks. The most important was to plant out the cucumber and bush bean plants that had been getting bigger and bigger in the little pots I had sown the seeds in. Since beans and cucumbers are said to be good companion plants, I decided to resurrect the previous cucumber trellis – basically string strung haphazardly between a pair of poles – and to create a bed around that for the bush beans. There was a bed of caladiums and Elephant’s ears growing between the poles that I decided to keep, and I had even been to Daiso to buy a bunch of two-tiered plant supports for the beans. I knew it was going to look pretty.
It was quite a bit of work to clear off the lawn and make the border for the bed, but the work got done. I was looking forward to raiding my older compost heap next, to feed up the bed for the beans and cucumbers.
So, picture this – I had removed the grass and used the soil beneath that to level off some uneven parts of the lawn, and the planting bed was now sunken, awaiting the nice, dark compost from the bottom of my compost heap. I happily headed for the heap with the wheelbarrow and shovel and began to dig to expose the bottom of the pile. Remember that this was in mid-February, when Singapore was in the midst of the dry spell; and I had failed to realise that the compost heaps had all dried out and stopped breaking down! All I found were bone dry leaves, twigs and grass, which left me high and dry, without the good soil I needed for my planting bed. I had to scrounge around to fill up the bed – not completely, though, because I still intended to top it off with compost, when it became available. (I made sure to water the heaps and keep them moist after that.)
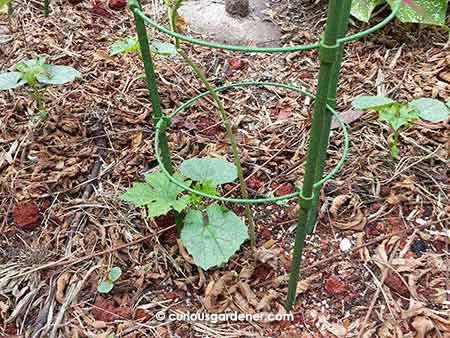
Cheeky volunteer plants – four bittergourd plants, with one right at the base of one of the bean plants. I guess there must have been a fruit in some of the compost I gathered. A couple more plants germinated after this, too.
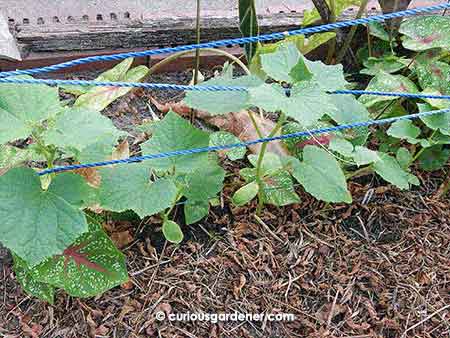
Well, the plants did go into their new home that weekend and settled in. I also made sure to mulch the bed well with fallen leaves from the belimbing tree. Why that tree? Because the leaves are soft and are quite absorbent when damp, and they break down more easily than other leaves that we have here. I also chose them because I saw how effective a thick layer of them was last year when a volunteer red spinach plant survived without being watered (or noticed early) by us through that dry season. In the present, the tree had already shed lots of leaves, and there were lots of drifts of these leaves here and there, which I gathered and spread over the bed, keeping them away from the stems of the plants, just to be safe. Once the plants settled in (and needed less watering), the mulch proved quite effective in handling the dry heat. A thicker layer would have been even better, but there weren’t many more leaves to be found.
An interesting side effect of gathering the mulch was the bunch of volunteer sprouts that appeared in the bed. I initially thought they were roselle seedlings, since there is a plant nearby, but when I accidentally bruised the leaves, I realised from the scent that they were bittergourd seedlings! This was a happy surprise because our last plant had died off and I had been unsuccessful in growing new plants from the seeds I’d saved. Well, since the cucumber plants were already established, and the bittergourd is also a cucurbit, I moved the latter to another trellis to avoid cross-pollination.
So, I’m happy to say that the new veggie bed is looking promising, although I’m a bit concerned about whether the bush bean plants will bear for us in our climate since the flowers keep aborting. Oh yes, and beetles like to come and feast on the leaves at night, which means I have to go hunting by torchlight at least every other night to cull the beetles. My neighbours must think I’m nuts! Thankfully, the cucumber plants look much healthier – these are the ones grown from the Known You seeds – and have started flowering. We should start getting cucumbers in the next week or so!
What are my lessons from all this? Don’t let compost heaps dry out. Make sure you have the soil necessary before digging out the bed, because you never want to have exposed soil. It’s okay not to pull out seedlings immediately because sometimes you get nice surprises. It’s also good to space out the heavy gardening work so you don’t get over-tired.
The veggie bed after adding the top dressing of Greenback potting mix. The potting mix was so dark and rich that the mynahs came immediately when I finished to inspect it for food!
This tale ends with my finally beefing up the bed with proper compost. Yes, I caved in and called on my friends at Greenback Compost. No, I didn’t get another ton this time. While I did get a small quantity of compost, I was intrigued with their new ready-to-use potting mix that is a combination of sand, soil, charcoal and compost. I used that to top off the veggie bed – after first removing the leaf mulch then replacing it – and hope the plants enjoy it. I know I’m going to enjoy watching the plants grow and be productive!
© 2015 curiousgardener.com All rights reserved.