
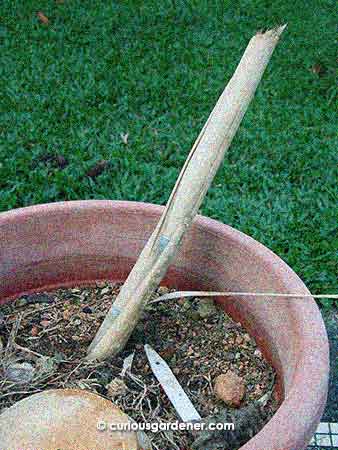
This looks like a stick stuck in a pot, but it’s a cutting of sugarcane beginning to grow!
There are some plants on my “want” list, and sugarcane was one of them. Why? Two reasons, really – it’s an edible plant that can grow here, and it was mentioned as a good border plant to grow in a permaculture garden.
Permaculture is another item on my to-do list, but I haven’t quite embraced it completely – but that’s another story…
Anyway, when one of our neighbours did some clearing and left out a few stems of sugarcane for disposal, I helped myself to a half-metre piece of the top of the stem, to try growing it. One gardener’s waste is another gardener’s propagation joy…
I had read that to grow sugarcane, all you have to do is cut the cane into one-foot lengths, dig a shallow trough to lie the stem sideways in, and cover it.
(Subsequent research showed that you can pretty much use ANY length you want – segment by segment, or an entire length of cane!)
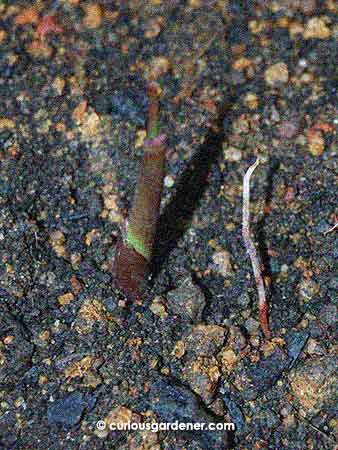
This is a day-old sugarcane shoot. They are fast-growing plants, I’ll tell ya! I have no idea why one of the roots is sticking up, to its right.
Well, I had only a half-metre (or 2 to 3 foot) length, and half of that was still sheathed in leaves. I stripped off all the old, dry leaves – the green ones were too tough to pull off – and noticed that there was a small nodule on every segment of the stem, alternating on either side, just above each joint. What if, I thought, each of these were potential buds?
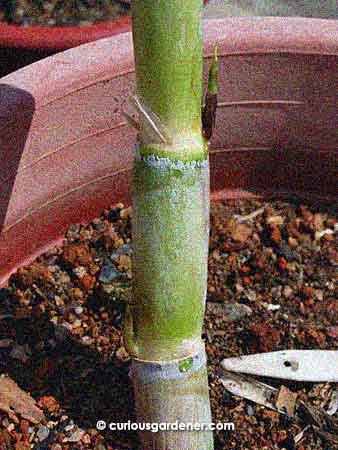
A different angle of the long stem cutting after the shoots started growing (see them?). I stripped off more leaves because they had dried up and were easier to peel off.
So, I had the brilliant idea of cutting the bottom half of the stem in the middle of each segment, so that each piece had a bud on it. That gave me a double handful of planting material, which I buried shallowly in a flower pot.
As for the top of the stem, I was informed that the practice in the Philippines is to cut the bottom of the stem at an angle, and to also poke it into the ground at an angle. I cut it accordingly and pressed it at what was supposed to be a 45-degree angle into another flower pot, then watered both sets of plants and left them where they would get lots of sunlight.
Research after doing my planting informed me that the roots grow at each joint (the ring around the stem), so I assume that cutting the stem at an angle just helps in poking it into the ground, like a spear.
About two weeks later, the first shoot broke through the earth. It was from one of the small pieces. After that, more shoots appeared, giving us a total of ten, so far.
Then the longer stem decided to get in on the action. I noticed one of the leaves starting to split. It took two days for a new shoot to emerge and start growing, with a similar one appearing on the opposite side of the stem. Since the leaves were now old and dry, it was easier to strip a few more away to get a better view of the new shoots.
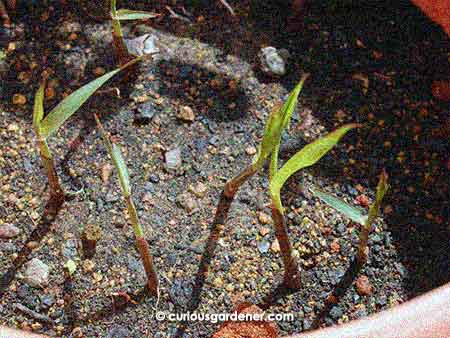
The happy sugarcane shoots. They look very grass-like at this stage!
So, it appears that propagating sugarcane is not difficult, and that we will have a few clumps of it growing here. Interestingly to me, I’ve learned that it’s classified as a grass. As long as it doesn’t become invasive, I’ll be happy to let it keep growing. All I have to do is pick a few spots to plant the babies, and sit back and let them grow – for about a year. If I were truly practicing permaculture principles, it would go to a Zone 3 or 4 with other plants that don’t need a lot of management. Now that’s lazy gardening!
© 2013 curiousgardener.com All rights reserved.