March of the Clouds

Naughty grasshopper that decided to snack on my bean leaves. It's not welcome any more, but it was interesting seeing it after not seeing any for many years. Or perhaps we just didn't grow anything it fancied until now...

Here we are in early March, and the weather is still horribly dry and hot. The grass crackles as you walk over it, and many of my poor plants are pleading for more hydration with drooping, wrinkly leaves. Worse, my snap beans keep flowering but aborting, so I haven’t had the pleasure of seeing any of those pretty pink flowers bloom as yet.

But, there is a lining to the cloud. Better yet, there are more clouds in the skies — but they have yet to do more than drift tantalizingly by. I’ve noticed the temperature dropping a little, so I hope this means rain will follow soon.

The dry weather is a further torture as I have in my hands various packets of vegetable seeds, but am cautious of sowing until I’m sure they have a decent chance of growing.
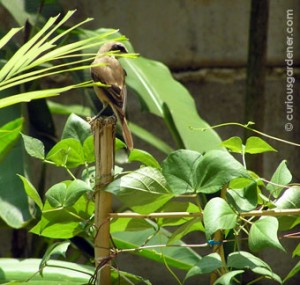
Brown shrike on the lookout for prey from its perch on my bean trellis. It's a fairly regular visitor.

One reason I don’t mind the delay is because I’m using the time to learn more about the concept of permaculture (permanent + agriculture). It’s about planning your garden to be a series of systems that are based on nature. In this way, it’s more self-sufficient (since in nature, everything happens naturally with no interference from us) and more environmentally friendly.

Go green, I say.

There are many online resources available, but the most friendly one I’ve found so far is at Tropical Permaculture, an Aussie-based site. It’s informative and not too technical (a plus for this blur sotong), and I’ve found it encouraging enough to decide to take the plunge to order a book, The Permaculture Home Garden, to learn even more. It’s a worthwhile investment, I think, and if it helps the environment more, good.

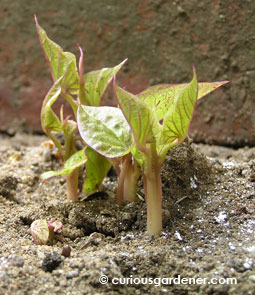
Sprouting sweet potato leaves. What a gorgeous colour combination!

On a happy note, my sweet potato has sprouted. My friend’s loss of an old sweet potato was my garden’s gain, and I’ll be anxiously awaiting the shoots to grow so I can use them to grow more plants. One problem with sprouting from a tuber is that pests are attracted to the sweet potato. My first attempt 3 months ago was thwarted by my dogs (or maybe a rodent?), because it was dug up and eaten in a matter of days. This time around, I’ve put barriers around, but ants have discovered the potato below ground. Growing edible plants is certainly a challenge!

So it’s with fingers crossed that I prepare the future sweet potato bed and hope the shoots can grow undisturbed to be replanted later. And, I hope those passing clouds do more than just pass by, because the plants sure could do with some “showers of blessings”!

© 2010 curiousgardener.com All rights reserved.


Share

‘Tis flowering season!

Flowers of the Dracaena Surculosa

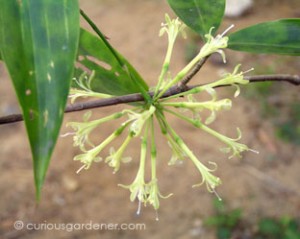
We’ve had pots of Japanese bamboo (aka Dracaena Surculosa) around home for the longest time. As far as I knew, they’re foliage plants. So it was with great surprise that we spotted a bunch of flowers last week on our Dracaena Surculosa Punctulata, that bloomed for just one day. Aptly enough, it was my father’s birthday – and he got the plant, so many years ago. What a lovely gift to him!

Beans in bloom

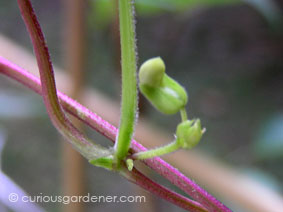
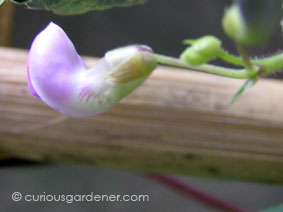
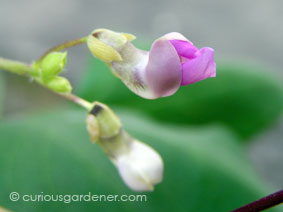
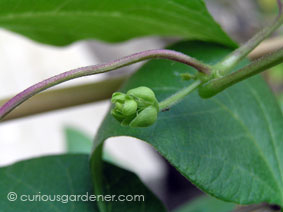
My snap beans have reached maturity after 6 weeks. The first flowers have begun to emerge, and here are the pictures of their first days…

The flowers begin to form

The flower begins to take shape

The flowers develop some more...

...and more ...

The petals begin to emerge

Here’s hoping that the unusually hot weather we’re experiencing now doesn’t affect the plants adversely!

© 2010 curiousgardener.com All rights reserved.

Share

The gorgeous Peacock Flower

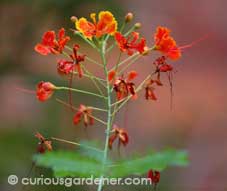
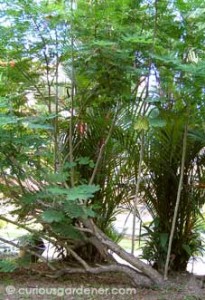
Orange variety of the Peacock tree

My interest in growing plants began about 8 years ago when I first set eyes on the Peacock tree. The amazing colours of the flowers caught my attention, and I knew I had to have them growing in our garden.

Peacock trees were the rage at the time, so they were everywhere. I managed to snare pods from a friend’s neighbour and from a roadside tree, and proceeded to attempt to sprout them. It was fairly easy and I found myself with too many seedlings. So, I planted a couple where I wanted them to be, and I planted the rest in different locations to see how they would fare.

Peacock tree seeds

They fared well. So well that I had one that I called my “experimental” tree. It survived being moved to two different locations when it was fairly mature, and proved it’s survival status when I beheaded it so there was only one foot of the stem left, with no leaves. My intention was to get a bushier plant out of it.

To my great delight, it did exactly that, and eventually grew into a big, bushy tree.

Problems with the trees

I suppose Peacock trees are naturally scraggly-looking for a reason. They don’t have deep roots, and two of my trees fell over after heavy rain made them top-heavy. We pruned them down and righted them, and they continued growing happily. However, they need constant trimming to keep down their upper weight.

My experimental tree went through another unplanned experiment. It toppled over three times, and after the last time, I thought perhaps it was time to say goodbye to it. I mulled over that for over a week because I was quite fond of it — and I guess I was trying to delay having to get near it with shears.

The "experimental" tree

Peacock trees have notoriously thorny branches. The thorns on the green branches are as sharp as needles, and when the branches become woody, they become only slightly less sharp. Pruning Peacock trees is not one of my favourite tasks! In fact the only possible nice thing about pruning them is the pleasant scent of the cut branches.

Since that tree was more than a storey high when it fell over, we did the pruning over several days, a bit at a time. In the duration, the tree was busily adapting to its new circumstances. It was lying on it’s side, and began to take root where the trunk touched the ground. It also sprouted new branches from the now horizontal trunk. I noticed all this and decided to see how this would turn out. Unexpectedly, we found ourselves with nice, thick foliage from a single tree, that since it was more securely rooted, was more stable than before.

Visitors to the Peacock tree

A green parakeet has a snack

Many birds like the Peacock tree. It provides a shaded perch to sparrows and sunbirds, and a source of food to other takers. Green parakeets visit often to snack on the beans produced by the tree. They are adept at plucking the pods and prying them open to eat the beans inside. Their colour camouflages them well, and they are quiet and rather shy creatures. You know when they’ve visited when you see a lot of eaten pods scattered beneath the trees!

Another creature that came for food was a plantain squirrel. It liked the dried bean pods, and visited for about a fortnight until it became roadkill. We don’t know where it originated from because it was the first and last squirrel we’d seen.

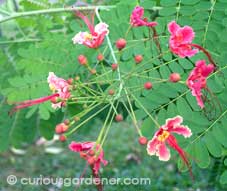
Peacock tree flowers

Pretty pink flowers

I mentioned that I had been initially attracted to the Peacock tree because of the flowers. The main varieties are yellow, orange and pink. Since I found yellow common, I chose to get the orange and pink varieties. The gorgeous thing about the flowers is the beautiful colour pallette.

Orange flowers have yellow edges to the petals and deep red stamens topped with bright yellow anthers. Pink flowers have the same stamens and anthers, and the petals have a pale pink edging, with one yellow petal in the middle. When the trees flower, they are absolutely beautiful, and they bloom all year round! I definitely have no regrets adding these beauties to our garden.

© 2010 curiousgardener.com All rights reserved.

Share

Growing ginger

Ginger is one of the most common ingredients in cooking all around the world. It spices up all kinds of foods and drinks, both savory and sweet. It has been used for centuries in many cultures as a spice, snack or for medicinal purposes.

Technically, ginger is a rhizome, not a root. The part of the plant that we eat is formed underground, with roots growing out of it, and shoots that grow above ground. It’s just a common assumption that since it grows in the ground, it’s a root. Not.

Here in Singapore, ginger is used often in cooking, so I figured I’d give growing it a go.

How I started growing ginger

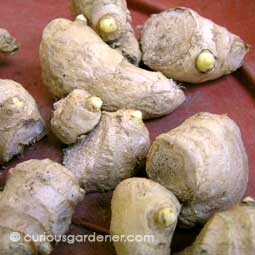
Cut ginger rhizomes with growing buds

My first attempt at growing ginger was in idle fun. We had a piece of ginger that had been kept too long and had started sprouting. I placed it on the surface of an unoccupied flowerpot to see how it would grow. When the sprout turned green and the first leaf began to form, I thought it would be better to plant it in the ground. Unfortunately, the roots broke off from the top of the plant when I was attempting to transfer it.

This just made me want to try again, so I bought a packet of old ginger from the supermarket and kept the rhizomes until growing buds began to appear. To maximise the number of plants I could grow, I cut each rhizome so that there was one good growing bud per piece.

You can have more than one bud per piece of ginger planted, but I thought I’d go with just one. That could be a risk, but I didn’t think it would be, really.

After cutting the ginger into smaller pieces for planting, I kept the pieces in a dry, dark place for a couple of days until the exposed surfaces of the ginger had dried. That also gave the buds more time to grow.

While waiting for that, I checked the locations where I wanted to put in the plants, and decided to mix in some compost to enrich earth that was on the sandy, clayey side. You’re supposed to do this a few weeks before planting, but, hey, I’m impatient… :)

Planting the ginger

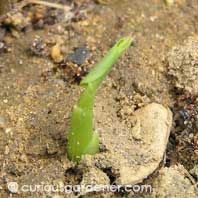
When the rhizomes had dried suitably, I followed instructions from several sources and planted each piece of ginger between 8-10cm deep, growth bud facing up, with a space of 15-20cm between each plant. It took 2-3 weeks for the first plant to make an appearance.

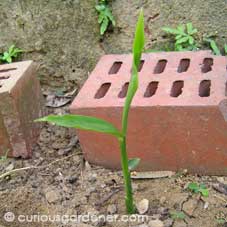
The first ginger sprout, 1 day old

Since I had so many candidates for planting, I decided to experiment with different locations. The first lot was planted directly in the ground under the shade of a mango tree – about 1.5m away from the tree trunk. They get some sunlight from morning through noon. I had a 50% success rate with the sprouts (so far).

The next lot (I waited for suitably sized growing buds first) was sowed a week or two later in a sunny location. I had read that ginger does not like full sun, but since we live in the equatorial region, I thought I’d see how they do in our climate. To my utter surprise, I had a 100% success rate with the sprouts.

Ginger plant, almost a week old

I also have one plant growing in a pot, as a test for friends who live in apartments and who complain that they can’t grow such veggies. That was one of the first rhizomes to sprout.

My final lot was planted in the shadiest location of all under the mango tree. That spot gets late afternoon sunlight. It’s too soon for sprouts to appear yet, but I’m keeping an eye on the place.

The oldest plants are a week old now. It supposedly takes 8-10 months for the plants to mature, so the watching and waiting goes on…

Links:
Wikipedia: Ginger
Tropical Permaculture: How to grow ginger?

More posts on growing ginger plants

© 2010 curiousgardener.com All rights reserved.

Share